blog

resources

read alouds

Designed by PJ's Design Laboratory. Powered by Blogger.

Why do leaves change?

 Why do leaves change color? That's always the first question I hear out of my kids mouths when it starts to happen. I found this fun experiment that helped it hit home!

Here are a few books I recommend reading to students to learn why:


Students always get so much out of videos too. I always go to Mystery Doug if I can! 


Alright, now for the experiment! Here is what you need:
  • Clear Cups or jars
  • water
  • rubbing alcohol
  • leaves of like color
  • white tissue or coffee filter
Here's how I would start it off in my classroom...

1. I would take the kids on a leaf hunt. Give them each a plastic bag and tell them to fill it up.
2. Once inside, instruct students to sort leaves by color! 
3. Combine the classes leaves so that you have about 4 different colors of leaves grouped together.
4. Next, cut/rip those leaves into pieces. About 1/2 inch to an inch is great!
5. Put leaves into mason jars or clear cups. Only fill it about a quarter of the way up.
6. Add equal parts rubbing alcohol and water.
7. Stick a tissue in or a white coffee filter.
8. Make sure the bottom of the tissue or coffee filter is IN the solution!
9. Wait for about a day to observe the changes that happen!

A lot of these tasks can be placed into centers so that you don't need to use precious whole group time to complete them! You can save that time for discussion and learning about the WHY!

Now, onto a few pictures!

As you can see, the color from the leaves travels to the top of the tissue! The leaves in the jar actually change color. Can you believe these leaves were RED!


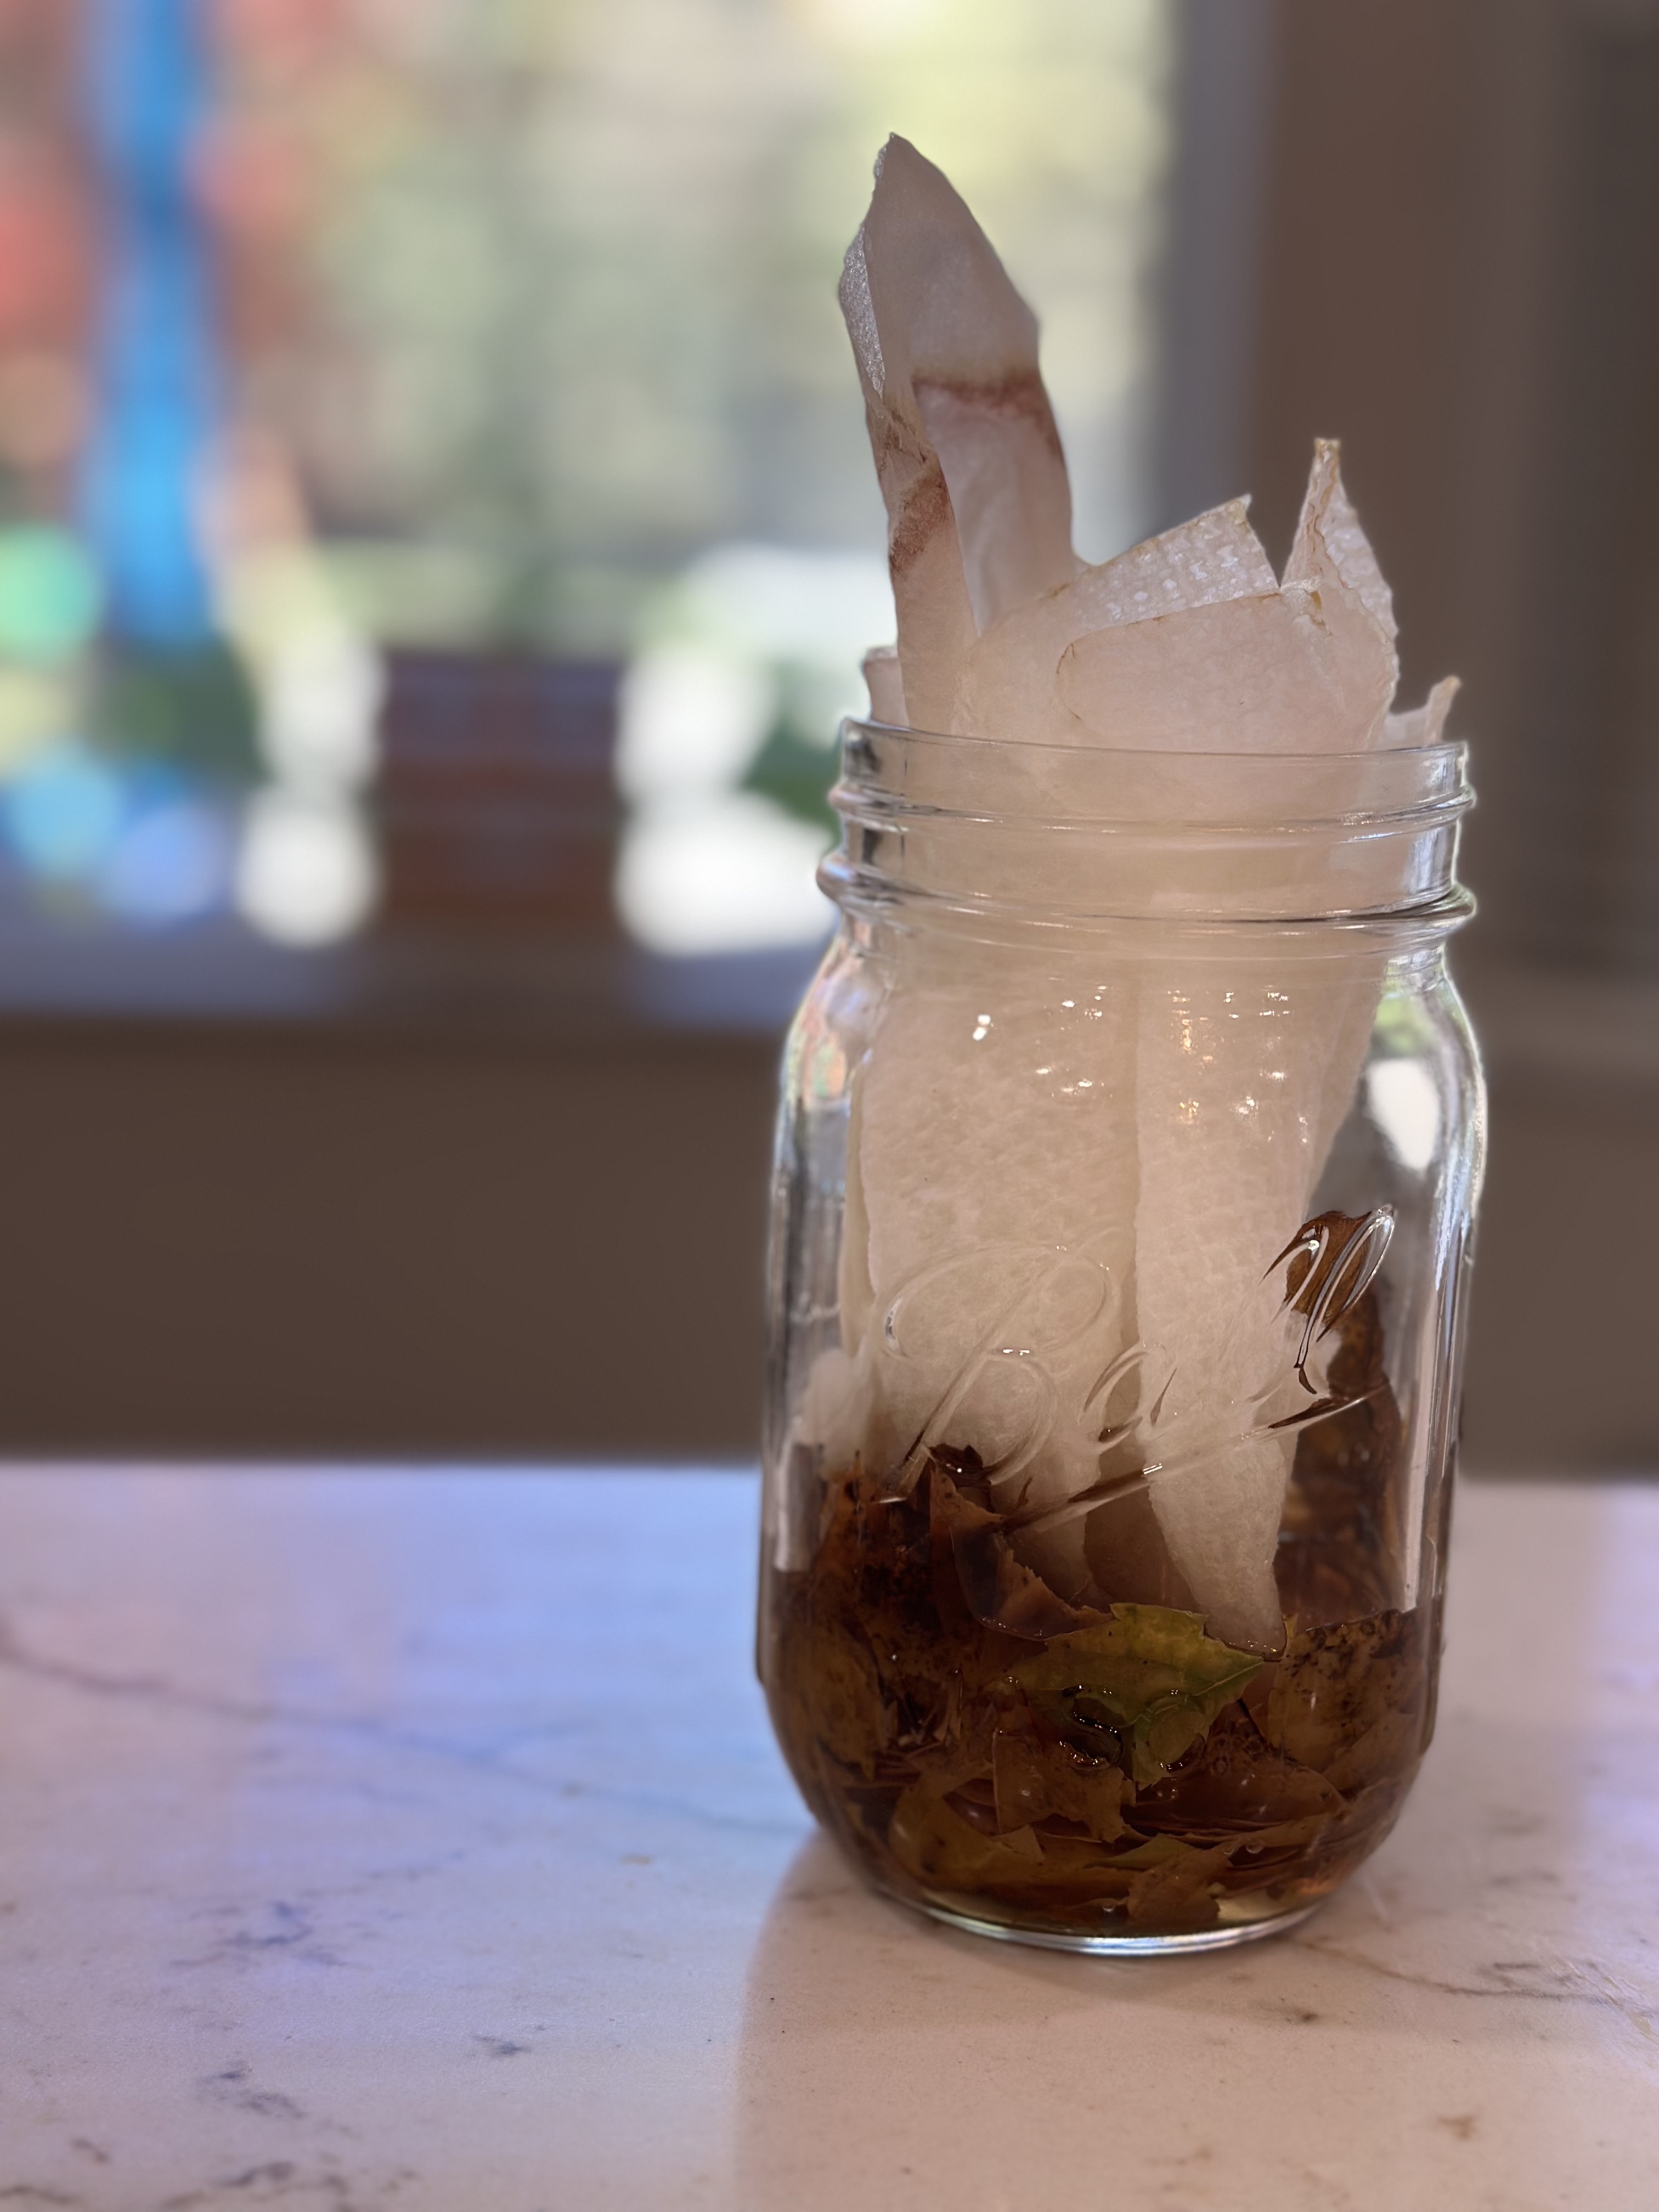
This is how we documented the changes. This is our before jar to show what the jar looked like before the experiment got a change to begin!


This is what the jar looked like after! So many comparisons that students can make here.


I made a few activity sheets to help you with your students with their learning.
Enjoy!! Click HERE!


Are STEAM Challenges really worth the time?

 Are STEAM Challenges really worth the time? 


This is a question I've asked when I see a STEAM activity or challenge. I'll be honest. I've heard of them and the activities look fun but how am I supposed to do that and teach my curriculum? Am I right?


Let's take a look at a simple STEAM Challenge that most of us have seen before:

Use foil to make a boat that can hold money.

It seems a little pointless right? Like, okay-neat, then what? In a nutshell, here's why it's actually a really purposeful activity to use in the classroom.

To begin an activity like this, you start by first doing a see, think and wonder.

Students should look at the boat and tell what they see. For example, they see it has sides and a floor.
Students should think about why the boat has these parts.
Then, they can begin to wonder about things like why does a boat have these parts and how does it help the boat?

This skill is an important skill to develop critical thinking. We ask kids to critically think about the text they read and the math problems they solve all of the time. It's a muscle that needs strengthened and this is a fun way to engage them in that act.

A see, think, wonder can be completed as an individual task first and then students can share their thoughts as a small or large group. You can also do think, see, wonders using only conversation and no individual think time.

After students practice developing their critical thinking skills you can give them their materials and their challenge -or- you can model how to create the boat using foil. I think all of this depends on the age and abilities of the kids you're teaching.


Once, students create their boat then they get to test it out! This is where a little Growth Mindset Practice comes in! I like to start having these conversations at the beginning of the school year but you can start ANYTIME!


As students create their boat, they will get the opportunity to TEST it out. They will identify if their design works or not. Chances are it will have a flaw, which is great! Kids can then look at it and think things like, "What isn't working? What do I need to add?" More practice with those critical thinking skills. 

If students get it right away, great! Now, let's add a little weight. Give students coins or another manipulative to set inside their boat. How much weight can their boat hold? Does it sink when weight is added? Why? If it works again, amazing! Now let's see if we can design a boat that's in a different shape. Will the boat still float? Will it be better?


The thought processes that are involved in STEM Challenges are invaluable. 

To incorporate content into this challenge students can:
  • Read a book about how boats work
  • Write about their stem process (How to writing)
  • Write a story about someone who spent a day in their boat.
  • Weigh the items in their boat
  • Compare the number of items in classmates boats
  • Identify a problem they were having and how they found a solution - or tried to find a solution
  • Draw a picture and label


Hey, Little Ant! Letter A Activities

I wanted to pop in to share a fun activity with you that I made for my children (ages 4 and 2). We began doing a little more intentional learning each day with a learning board that I put in their playroom. Then, each day we do some sort of math or letter activity.

During letter A week, we read the book "Hey, Little Ant!"


My son was super interested in this story. It made him think hard about squishing those ants. :)
The first activity is the letter a squish activity. All you need to do is print off the shoes that you see above and cut them out. When cutting them out you will want to leave strips of paper on each side. You'll wrap them around to create a place for kids to place their fingers. They wear the shoes on their hands like you see in my photo below.


Once the shoes are created, you'll cut out the letter cards to create little tents. Then, it's time to squish! I told Ezra (my son) just to squish the letter A. He had a blast! He wanted more! :)


When the letter squishing was finished, the kids did activities using dabbers.

My two year old did the dabber activity with the large letter A. My four year old did the activity with multiple ants. He squished only the ones with the letter A.


This activity was one we did at the end of the week.
On the first day that we learned about the letter A, the kids worked on their coloring with an ant.


On a different day they also did a ripped paper apple. The kids were given a red piece of construction paper and they ripped it into small pieces. They glued the ripped pieces of paper inside the apple.

Our last letter A activity that I did with the kids was an astronaut craft. You can find the astronaut pieces that you need here: Glued to My Crafts

We used popsicle sticks to make the letter a. Then, the kids colored and cut out their astronaut helmet. I cut out little gloves and boots for their astronauts. They glued these on too. Afterwards, they wanted to do more. We made "space." We used foil for stars! 

If you're interested in grabbing these letter A activities, you can get them by clicking the picture below!


If you're looking for more letter practice, check out the blog post below.