blog

resources

read alouds

Showing posts with label Reading Response. Show all posts

Officer Buckle and Gloria Reading Response

Hey guys! It's been a while since I've been on here but I just wanted to pop in to pass along a freebie that was inspired by our read aloud today.

Each Monday morning, after calendar I read a story to my class that will correlate with one of their reading stations: Book Response. Normally this station has a simple response sheet where they rate the book, tell what it was about, draw their favorite part and circle words to describe the book.

We decided this week to switch it up after we read Officer Buckle and Gloria. Inside the story a student writes Officer Buckle a letter using star shaped paper. My students thought that was so cool. So, this week, their reading response is on star paper. It isn't anything fancy and I've left it pretty open.

These are their choices that I'll provide:
(I'm also always open to their ideas too)

1. Draw a picture of a character and write events that happened to that character.
2. Retell the story elements.
3. Write your own safety tips (this goes with the story)
4. Write about your favorite parts
5. Retell the story

I printed one blank star and one star that has the words, "My Safety Tips."
I am going to leave this pretty open ended and let the students choose what they want to do.


Here is an example of two stars so you can get an idea. I made these two stars as examples for my own students.

To grab this for free, just click here or the picture below!


16

Book Activity: Cami Kangaroo Has Too Much Stuff

I have found the most adorable book that is SO realistic and relatable for students (and me)! It's called, "Cami Kangaroo Has Too Much Stuff!" This book is about a kangaroo named Cami who had to clean her room so she could be on time to a party. Her parents sent her to her room to clean and in the midst of cleaning, she got overwhelmed and very distracted by all of the cool things she found. Also in the midst of cleaning, she realized that she had to return a toy to a friend... but, she couldn't find the toy! Oh no!! The story ends with a lesson that Cami learns about being organized and a way that can also help her clean up effectively.


Here are some images from the text. The illustrations are just beautiful.


In addition to this amazing book, I had to create some fun activities for my students to do. Once I got going, my son asked to color a Kangaroo too... So, I may have also thrown in a few Pre-K activities too!

This book lends itself to such great discussion, text connections, character analyzing and focusing on story elements. It's PERFECT for the classroom. I'm thinking, it'll be our first read aloud series of the year.


Here are some of the toddler activities I created to go along with this book!
There is an adorable Kangaroo puzzle and a kangaroo coloring page with the letter K! 
My little man and I may have worked on a few other letters too! :-)


If you own this book or are about to own it very soon, here are the FREE activities for you to use with it!

You can also find the book by clicking here.


Enjoy!!


1

HANDS ON - Jamie O'Rourke Character Analysis Project

It's officially the week of St. Patrick's Day! That means it's time to really ENGAGE the kids so we aren't peeling them off the ceiling! I started some St. Patrick's Day themed stuff a little early. Last week we read the book, "Jamie O'Rourke and the Big Potato." This is such a great book! I highly recommend you add it to your classroom library collection!

When we first began reading this book on Monday, we did a simple prediction and confirmations of predictions lesson. Tuesday, we did a nice little retell. I love starting the week off that way to get the kids to really understand the story. Wednesday-Friday we were all about analyzing the two main characters: Jamie and Eileen!

We started analyzing the characters by discussing their outside traits, what we see with our eyeballs.
We wrote down their outside traits.


After writing their outside traits I gave the kids body outlines for a boy and a girl. Students were instructed to use the outside traits to draw Jamie and Eileen as best as they could. Students had to really attend to the outside traits of the character in order to draw Jamie and Eileen. It was an awesome way to see who notices key details. We don't just need to practice it when reading, but in all areas of our lives. This was a great way for the kids to see that.


On Thursday, I read the book again to students. This time our purpose was to identify inside traits for the two characters based on their actions and words. We stopped and had a LOT of discussion. The students came up with amazing words to describe both characters. Naturally, I forgot to take a picture of it! Anyway, after we came up with words to describe the characters inside traits, the students wrote the outside trait on a note card folded in half. Then, on the inside students provided evidence from the story to explain why they chose that trait for the character. They had so much fun. They were aloud to work by themselves or a with friends during this activity. I let them choose. There was all sorts of great conversations going on during this activity. Students were referring back to the book to look for evidence. I mean, what more can a FIRST GRADE teacher ask for! 


As you can see above, the note cards for inside character traits went inside the bag. Then, students also labeled the outside traits on the outside of their bag.

On Friday, students compared and contrasted the two characters. I didn't snap a picture of their writing but I gave them the following sentence starters:

"Jamie and Eileen are the same because..."
"Jamie and Eileen are different because..."

The students used their knowledge of the characters to compare and contrast. They wrote these in a pot of gold writing template. This activity was done at the very end of the day on Friday and they wanted to take their projects home to show parents so no picture! Oh well, you get the idea!

Have a great week! Thanks for stopping by! 


0

Tooth Trouble Activity Ideas

Welcome another edition of Books Teachers Love! This month, I'm introducing a book "Tooth Trouble."  I have read this book every year since my first year teaching. I don't remember how I found out about the book, but I fell in love with it. It makes the kids (and me) giggle all throughout!


The book is about an adorable kid walrus, named Wibur. At the beginning of the story, we find out that his tusk hurts. Everyone keeps telling him to go to the dentist, but he just doesn't want to. He keeps wanting to play with his friends and do everything they do but he can't with a sore tusk. Eventually, Wilbur talks with his grandpa who doesn't like the dentist either. His grandpa actually has a broken tusk. Talking to his grandpa caused him to change his mind about the dentist. The story ends with Wilbur realizing that goes isn't so bad. Then, he tries to convince his grandpa to go!

 ;) It's adorable!


I always use this book to model making inferences. 
There are so many opportunities to practice! 

First, I like to read the book with the kids and have them focus on Wilbur. 
We work to describe his inside and outside character traits.


After we work on describing Wilbur, then we work to provide evidence!


I also like to allow students to think about a particular part of the book to practice their inference skills.

There is one part in the book when Wilbur realizes that he should probably go to the dentist.
It's when his grandpa tells him that he never wanted to go with the dentist either. Students can really infer here by looking at the characters face and grandpa's missing tooth! :)


You can grab the printables here.

Click below to check out more January books!


Enter to win any four books of your choice!
a Rafflecopter giveaway


Image may contain: 1 person, smiling


2

Bone Soup: Books Teachers Love!

Alright! You have got to get this book, "Bone Soup!" It's adorable and perfect for so many reasons! Let's get started shall we?!

The book is super similar to, "Stone Soup." 
The character in this book is Finnigan. He is known for his enormous appetite and on Halloween he enters a new town. All of the creatures who live in the town quickly hide their food once they find out Finnigan is on his way! He knocks on doors to see if they have any food, but they all say no. So, Mr. Finnigan, plays a little... what I call, "trick" on all of these creatures. He gets a cauldron ready and puts in a magical bone to make some delicious bone soup. He just needs a few ingredients though. The other creatures come around and they all end up sharing their food in order to make the bone soup complete. So, in the end, Finnigan does get a HUGE feast and he is hungry no more!


I will use this book in a few different ways, I plan to have students sequence and compare and contrast "Stone Soup." I will be also having students respond to the book with an opinion. They will also do a directed drawing to go with their reading response. We can NEVER have too much practice with following directions! 

In the response, students circle if they would or would not like to eat bone soup. Then, I want them to provide a reason and a conclusion. We will do a lesson on opinion writing before they do this response.


After the response is finished, that's when they will do the directed draw. I always draw the picture with them for my visual learners!

By the time we reach this book, we will have already learned about digraphs. So, I created a quick SH/TH sort! Students sort their bones, and write their words on a recording form!


Thanks so much for stopping by to read my post! You can find the activities for free here!


Check out all of the other Books Teachers Love books below!


Enter the giveaway too, and you'll have a chance to win any of the four books you see above!


a Rafflecopter giveaway
0

How to Structure Your Reading Block!


Hey guys! So, I have toyed around with a lot of different reading block structures in my little teaching career. I've taught with a basal and I've taught without. I have tried a lot of different systems in my classroom to find the one that works just right for me. I want to share some of those with you so you can find the best way to structure your reading block because lets face it... we can't fit it all in... even though we wish we could. I'm going to share ones I've tried and the one that I am going to try out this year! I hope this can be helpful to you!

So, let's get started!
There so many ideas on how to organize reading workshop in the classroom! I love this pocket idea!


We'll start with how I used a basal in my classroom. (Don't mind the old pictures) :-)

When I had a basal in my classroom, I didn't use it like it was supposed to be used. 
My reading block was structured just like a D5 block.
I also didn't have time for a writers workshop, nor did I know how to do writers workshop at that Time!

I started each reading lesson with a whole group lesson.
 I chose a read aloud and completed a mini lesson with the students.

I remember this week specifically, because it was a favorite.
This week we were learning about the Walrus.
For my first mini-lesson this week, I read the book, "Tooth Trouble."
After I read this book, we talked about the steps to brushing a walrus's teeth using the first, next, last signal words. Then, we came up with materials.
During their writing station on that day, the students were to start writing about how to brush a Walrus's teeth.
Day 2, mini-lesson we shared and wrote down materials needed.
Day 3, we read a non-fiction passage about Walrus's and identified the fact.
Day 4, we answered text based questions.

The basal was used in my guided reading lessons. Sometimes I created graphic organizers to go with the story and sometimes I pulled graphic organizers. With my at level group we basically used this story for most of the week. We worked with phonics skills, sight words and various comprehension skills. My low group, worked with just phonics on one day, then we moved into reading the story. We read it all week and then towards the end of the week we finally worked on the comprehension concept. My high group would read the story by themselves, come to me for their comprehension lesson. Sometimes, I gave them independent work to also complete with this story. Then, after my high group read the story, I was able to work with them at their own level.

 I did have each group read the story with me, at least one time because on Friday all of  the students were to take a comprehension test.


Each comprehension activity was also differentiated.
If you want to read more about how I did that, then click here.


My reading structure at this time was a lot like the Daily 5 structure, but with my own twist. 
The students spent 10-15 minutes at each rotation.
It just depended how long I met with the group at my table.

At this time, I did not use regular word work activities. I used literacy station activities that were more skill based because our day was so tight and we didn't have much time to practice each day.
You can see the literacy stations here.


Many of the different structures that I've tried are with the reading workshop approach. It was in third grade, but these structures can be done at any grade level. My new school follows the reading workshop approach, which is kind of what I did anyway. They have a BIG focus on independent reading and the kids LOVE to read! I love that, and I could have easily done a mini lesson, had kids independently read and then respond to their text. But... to me, that just wasn't enough! I wasn't willing to give up literacy stations, I love the extra practice they provide to the kids! 

So, needless to say, I tried out a few different structures last year-here we go! :)

1. My first structure that I tried went like this:

I followed more of a Daily 3 approach. After assessments, students were placed into their reading groups. Then, they began their reading stations. The students visited three stations each day. The longest station was, read to self- everyone went to read to self at the same time.

The rotations were as follows:
You can find the rotation cards here.
You can read this whole blog post here.


Group 1: Spelling Station, Read to Partner, Read to self
Group 2: Word Study, Task Cards, Read to self
Group 3: Read to partner, Word Study, Read to Self
Group 4: Listen to Reading, Spelling Station, Read to Self
Group 5: Task Cards, Listen to Reading, Read to Self

Then, the next day, I moved the cards down to the next group. For instance, the next day, group 2 would go to spelling and read to partner and group three would do word study and task cards. This ensured that the students were able to get to each station each week.

I met with students at guided reading during their stations. Yes, sometimes they missed a station. After the first two rotations, I stopped and completed a mini-lesson. Here is a little explanation:

There is an entire post on just a readers workshop - you can find that post here.

********************************************************************************************************


2. Another reading block structure I tried was this one:

This idea came from my literacy coach. I expressed my concerns to her and she helped me organize my thoughts. I did love this structure, but the only thing missing were the stations...

Anyway, I lined up four pocket cards. Inside, there were note cards. On the top of each note card, I wrote the order in which our instruction was going for reader's workshop. I met with guided reading groups during cards 1 to 3. These cards were great because during respond to reading and the spelling notebook, students got to work at their own pace.


When I used the cards, my reading block looked like this: 
First, I did my mini-lesson:
This week our read aloud was Charlotte's Web.
We worked on plot using this activity.


After our mini-lesson, the students followed the cards. First they independently read for about 30 minutes. I met with 1-2 guided reading groups.
After independent reading, the students worked to respond to reading.
I had them do the same thing we did in our whole group lesson, just with their own book.
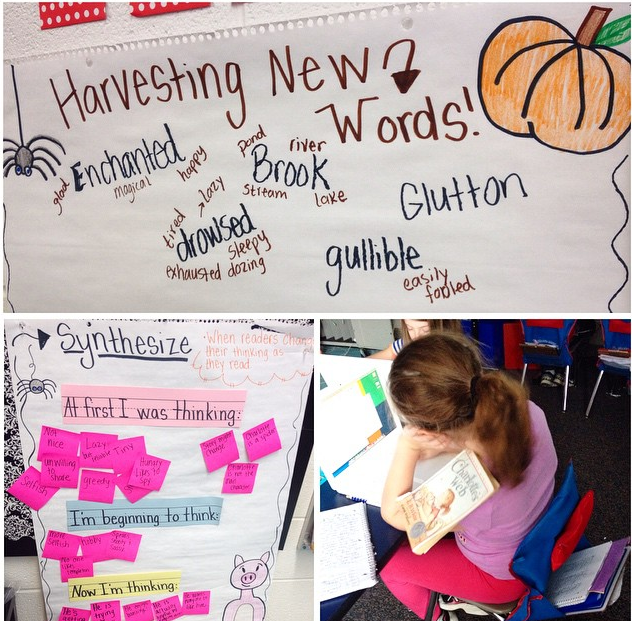
This student below is working on plot.


Not all lessons were able to work perfectly like this for respond to reading.
Some mini-lessons were gradual and took a few days.
During our Charlotte's Web study, we also focused on other comprehension concepts.


Sometimes, respond to reading was a writing assignment.
Sometimes, the kids worked on a graphic organizer.


Sometimes, it was just a reading response in their reading journal.
You've really just got to tweak the 'respond to reading' to make it go with what you are teaching.

Here is just a simple lesson. We did these pretty often!
For our read aloud, I had enough Stone Fox books. The students and I read Stone Fox together.
Our mini-lessons worked on predicting and confirming predictions. 
For each chapter we read, we first predicted what would happen. 
Then, after the chapter we confirmed our predictions. 
At the end of the book, we focused on how a character changed.


Then, after students did their independent reading, they chose a reading response and responded to the text.

Use cut and glue prompts during reading workshop! I love the ideas on this post on how to organize my reading workshop time!
Now we are onto pocket #3 - Spelling Notebook.
Each day students worked on their Daily Spelling Task in their spelling notebook.


When students finished this, they moved onto writers workshop. They just continued to work on what we worked on the previous day until it was time for our mini-lesson!


I have to admit, I wish I would have kept this reading structure. :-o
... Even though it didn't have the reading stations, I did find a way to fit them in during guided reading time. Just a thought for you if you are contemplating this one! :)

*****************************************************************************

3. The last reading structure I used was another station one! :-) I tell yah.... I just love them! I decided to go back to stations because, the rotations kept ME more accountable when meeting with guided reading groups. We all had a schedule to follow (mainly me). I needed to know who was coming when, and I didn't want the kids to miss anything.

Here is how this one went.

Still had our whole group mini-lessons:


Then, we broke out into stations.

These stations were different though. Like I said, I didn't want the kids to miss anything!
So, each week students got a reading choice board and they filled in their own station schedule. The only set times were the TT (Teacher Table) times. I had sticky notes by their groups names that had the days and number of rotation that they were coming to meet with me at the TT.

On the reading choice board I had a number by the station choice. That number told the students how many times they had to get to that station each week.

Read to self was 5x a week.
TT was assigned
Read with someone was 2x a week
Word Work was 3x a week (these were skill based literacy stations)
Spelling 2x a week (Spelling Notebook)


The students kept all work for the week in a folder. On Friday, students turned in their folder.
I still had students respond to reading. They only had to turn in one reading response, because we were doing a lot together as a whole group and in guided reading. 


This is the structure I stuck with for the rest of the year. It met students needs, it was easy to maintain and kept us ALL accountable!


This year, I am back in first grade. My reading block with look differently than all of the ones you've seen above. I am keeping it simple, and not doing too many complicated things!

I will be starting out each day with my whole group reading lesson. Each week we will have a read aloud, and we'll work on different comprehension concepts. I can't ever give these up! I love having my class learn together! 


Then, we will do our Reading Station Rotations.
I am going to have the following reading stations this year:

1. Read to Self
2. Skill Work
3. Word Work
4. Read to a Partner/Listen to Reading
5. Writing 

I am not sure if we can do all 5 each day. We may only do 3-4 each day unfortunately due to time constraints. 

For teacher table, each day I will just have my handy dandy Teacher Table Card. For each group I will just cover up one of their stations with my TT card and instead of going to that station - they'll come to me.

Here is a little visual of the reading rotation board I'll have.


What I plan to do, is cover up one rotation for everyone. So, this on this day, I took everyone's buddy reading time. The next day, I may meet with everyone during their writing stations, the next day, word work... etc.

I have certain plans for each station too:

Read to self - students will just independently read. I will not have them respond in first grade - third I probably would 1x a week.

Read to a partner/listen to reading: students will listen to a book together on CD on their assigned days. On the other days, they will simply read with a partner.

Word Work: Students will work with their spelling words and sight words using manipulatives like stamps, magnets, etc.

Skill Work: I plan to have a parent volunteer come in to read sight word passages with students and work on skill based literacy stations with the kids.

Writing: Students will continue to work on their writing workshop writing -or- choose a writing activity from choices provided.

The only thing I will ever need to prep is skill work! I wanted to make stations easier on myself this year! :-)

I hope this post was helpful! If you have any questions or additional ideas, comment below!! :)


7