blog

resources

read alouds

Showing posts with label Reading Workshop. Show all posts

Teaching Character Traits!

My favorite thing to teach is Character Traits. Pair it with my favorite book and I am in heaven! 


When I teach character traits, I also like to tie it in with my writing workshop time so students get more exposure to developing a character's identity.

When my students and I completed this unit, they had some previous experience with character traits. I didn't need to spend a lot of time going over inside and outside traits.
I used this poster to review the concept.


After we went over the poster, the students and I read an adorable story called, "Jan's New Friend." We discussed the events that happened in the book (a little cause and effect can be integrated). Then, students and I came up with words to describe the main character, Jan. Once the reading was finished, I paired students up with a partner and they re-read this book together.

The activity that I gave students included a list of inside traits. Only some of them described Jan. The students had to decide which ones described her and which ones did not. The students glued the words around Jan on the character trait paper. It's amazing how students naturally HAVE to practice pulling out evidence from the text in order to justify adding a trait to the paper. I love this activity!


The next day, the students listened to me read the book, "Cindy Moo" by Lori Mortenson. This may be my favorite book. Something about it just warms my heart.


Once we read this book, we discussed it and then completed a reading response activity to keep it simple for the day.


The next day, we revisited the book and started to dig into character traits and providing evidence.
We walked through the book and described her and students help tell why (provide evidence).


Afterwards, students completed a character trait paper on their own.
This picture gives you a look at all of the reading responses that we did.

We ended out our week with a little craft. Students practiced identifying Cindy Moo's emotions during the beginning, middle and end of the story. They also wrote about a text-self connection!


During our week of Cindy Moo, students also wrote stories with characters. It was SO much fun!
The purpose of the writing was to allow students to practice including story elements in their writing as well as develop their characters so we could identify character traits for them too!

To begin, I gave students three choices for a setting for their story. Then, I laid out a lot of character options for their stories.

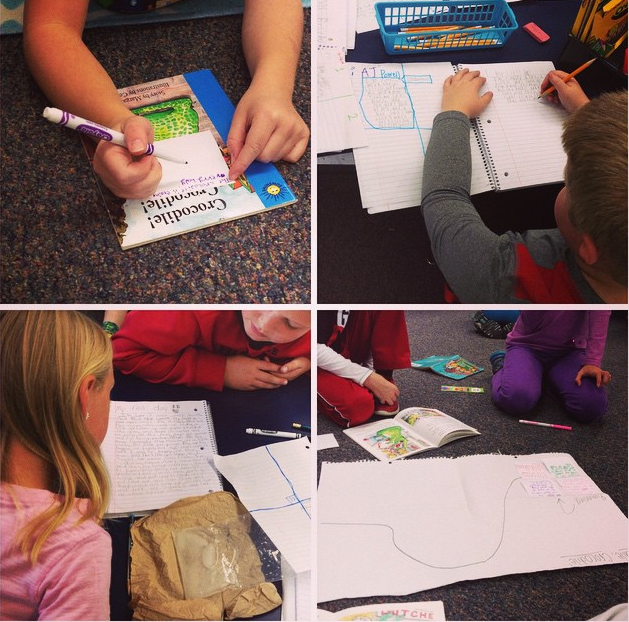
Once students identified a setting and characters for their story, then I let them play before doing any actual writing. This is always my favorite. Students get to be KIDS. They get with a partner and make up stories using their characters and setting like toys. Doing this always makes for amazingly creative stories.

Once students played, then we shared out our story ideas. We made sure to point out problems and solutions in stories because we wanted to make sure we all included one in our story.

Once we did that, then it was time for me to model how to take all of the ideas and turn them into real stories! We focused a lot on what belongs in the beginning, middle and end of a story. We referred to Cindy Moo during this too.


This is what I used to help guide my students through writing their own stories!

Once my students wrote their own stories and were ready to publish, the first did a little peer editing.
I am not always able to spend the time with students to edit their stories like I wish I could so I always have students meet with partners first. Honestly, partner editing works! If you haven't given it a try, do it!

The rule of thumb in my classroom is; I will not do a final edit until two people in the class have went through the editing checklist. In other words, two students need to help edit a story before I will do a final edit. 

Here is the checklist my students use. I laminate them and we use them throughout the year.


After students edit, then they work to on their cover page and adding detail to to their illustrations. I don't normally have students in first grade re-write their entire book. They only rewrite a page if it is not legible. 

If you're interested in this Character Traits unit, you can find it by clicking the picture below!


16

Reading Centers with a Checklist

I've received a lot of questions on Instagram about how I run my reading center time in my classroom. I have played around with this precious 45 minutes of time for years. I want my students doing work that is engaging, purposeful, relevant and encourages them to become responsible for their work while giving choice.

This has all led me to my little center checklist. The checklist that I currently use looks like the one you see below. I don't like to tie myself to centers with names because what we do throughout the year changes and I want their centers to grow with students.


When I plan my centers each week, I do try to keep them somewhat consistent. I use the planning template seen below. It's easy, but keeps me focused.


Here is an example of what it looks like filled out digitally. Normally, I just write them down with pencil because I like to be quick and simple! :-)


Here is a break down of how the centers run in my classroom. We will begin with the rotation chart!


When students have the checklist card by their groups name, then they have the choice to pick an activity they would like to complete for the day. They are required to complete one checklist activity per day. They are allowed to do 2, if one doesn't take them too long. They get pretty good at managing their time (another important life skill to learn)!

I introduce the new activities on Monday. Wednesday, I have kids turn in their folders and I do a midweek check up to make sure everyone is getting their work completed. If not, then they get Mrs. Hursh on their tail for the rest of the week. It only takes about 1 week of me nagging a student for them to kick it in gear for the rest of the weeks. ;-)

Here are the centers set up from last week. I'll get to the grading part here soon!

This week students are unscrambling sentences. I don't want to make a million sets of these cards, so I just cut out one sentence, place it in a bucket and write a number at the top. When students visit this center, they grab one bucket, unscramble the sentence and then record the sentence on their activity sheet. When they complete that sentence, they put those cards back, put the bucket back, grab a new bucket and repeat until all sentences are done. The kids don't lose cards this way and they aren't overwhelmed by way too many sentences at one. It helps them focus on just one thing at a time.


 To prep the craft center, I place student supplies in the two bins you see below. If there are little pieces, I just put them in zip lock bags. I make an example craft for students for them to look at while they create their own.

When students complete an activity from their center checklist, they place it in their center folder which also doubles as their 'catch up' folder.


When students finish an activity, they put a check in the box next to the correct center number.
When we first began checklists, I would ask students to circle the one they wanted to complete for the day. This helped them have a focused plan and allowed them to set a goal for themselves. I still do this with some students who have a difficult time getting started. In my mind, this system is a great way for students to be responsible and learn accountability with their work.

On Friday, I collect their folders, take them home and grade them. I place checks by the completed activities on their checklist, staple their papers together and return them on Monday.

Now, we do our two stations every single day. Some students finish by Thursday! I make sure their work is quality work that shows effort and if it is, they're able to make choices during their checklist station. The choices are ones that are still literacy based.

When I introduced the choices to students, I made this anchor chart right along with it so it held meaning. They refer to it often! (The students also love to complete these activities at indoor recess *win, win*).
You can find the activities I use for choices here.

I do not have students turn this work into me. However, they do LOVE to share their sticker stories with the class so we do make time for that at the end of the day once we pack up to go home.

If you would like any of the resources you saw above, you can click on the links below.


If you have any questions about checklists just comment below!!

I have another post about my stations with a checklist that I did a few years ago. It's a little different than I do now, but may give you more ideas!
Just click HERE for that POST!

You may also like these blog posts as well:


1

Scavenger Hunts with WORDS!

Good afternoon! This is my favorite part of the year in first grade. The kids are reading, they're demonstrating everything they've learned and the classroom is basically running itself. This is the time of year when I am also very TIRED! I don't really have time to be laminating station cards each week or cutting them. So, I like to pull out my Scavenger Hunt with Words to keep the kids engaged.


When I first introduce this activity, I have the kids do it with me whole group. I display the spinner, I spin it and together, we search for words that fit the rule.

The best part is that I don't have to prep any station cards ahead of time. The kids simply use the words in the room. They may also look inside of books if they can't find words in the room. This activity keeps them busy!... Which I love! They're active, engaged and on task!


Another great thing about this activity is that YOU can edit the spinner to make it fit what you are focusing on in your own classroom. If you want to focus on words that start with a letter, digraph or blend, you can type it into your own spinner.

If you are interested in doing this activity with you class you can click here!


0

You Think it's Easy Being a Tooth Fairy? - Reading and Writing Unit!

Hey guys! I am so excited to show you a unit series that I've begun simply called, Reading and Writing for First Graders! Each month, I'll be introducing two read alouds to you with full blown reading and writing plans for the week, including 3 literacy stations! 

I just LOVE this book!!


You'll get full blown, visual lesson plans inside the unit to walk you through how to carry out this unit throughout the week. I kept our busy schedules in mind so pacing for the week was actually manageable!


Inside each unit, you will find a 5 day reading unit that focuses on a particular comprehension concept or skill. This unit, includes activities to help first graders identify who is telling the story. It's a tough concept for our friends to learn, but I've made it very attainable and engaging for the kids!


This unit includes fun matching activities and writing activities to work with identifying who is telling the story!


In each unit, you'll also find something I call, Quick Writes! These focus on general comprehension of the story. These are great discussion starters to use with the book. You can have the kids make their flaps at the beginning of the week, bring their reading journal to the rug for your mini-lesson and as you read the text, you ask them a question. Students can write the response under the flap and you can share! Short, simple and effective!!

*********************************************************

In each unit, you'll also find simple vocabulary activities. Much of the time, you'll find prompts that allow students to make real life connections with the vocabulary from the text they're reading. I think it's so important to teach the vocabulary from the text. 1-the kids gain a deeper understanding of the story. 2-the kids learn to use the words in context which is turn.... does exactly what we want it to do--EXPAND VOCABULARY!! 


Inside each unit, you'll also find a full blown writing unit. You can be as involved with it as you want! I've included everything you need to allow your students to flourish with their narratives. The book I chose for this unit, lends itself perfectly to a narrative about when the students lost their first tooth. 99.8% of firsties have lost a tooth and LOVE to tell their stories!


Here's a look at what the kids final writing would look like! Nice little craftivity and all!


Last, those literacy stations I told you about! Here they are!!
They are designed to allow students to complete independently!
They're included inside the unit so you don't have to go purchase stations to match the theme separately! I like to place 2 in my word work stations and I always use one for a guided reading activity for the week to review a skill!


If you're interested in seeing more of this unit, click here!


1

Finding Good Fit Books!

This past week my students worked hard to make sure they filled their book bins with good fit books! We spent all week practicing and reading those good fit books. My kids have quickly fallen in love with read to self and we make sure we get our 15 minutes in each day.

Here is how we learned how to find our good fit books:

First, we read the book, "Goldie Socks and the Three Librarians."
In the book it talks about how Goldie Socks found her good fit book and it just so happened to be the little bears books! As we read the book, we talked about why she kept choosing those books and why she wasn't choosing Mamma or Pappa Bear's books.
After we read the book, I asked the kids to just look through their books today during read to self and think to themselves if they thought their book was or was not a good fit book. After read to self, we closed the lesson with a quick discussion of why some of our books were or were not good fit books.. Some of the kids knew right away that their book was WAY too hard.

On day 2, I introduced this poster to the kids which will hang in our classroom all year.
Then, I modeled how to go through a book using the good fit book test.
Afterwards, the students went back to their seat and looked at the books in their book bin to see if they were good fit books. If they were not, they set them beside their book bin. Afterwards, I spread out the book baskets around the room and the students went shopping for new good fit books!


We then, did read to self and as we were doing it, a kiddo went to our recycle bin (AKA book mark bin), got a marker and wrote a number 5 on the paper. Came up to me and said, "Mrs. Hursh, I made myself a good fit book mark so I never forget to use the good fit book rule." *Happy Teacher Moment.* This sparked an idea for the activity the following day because my kids are always wanting a bookmark *proof they're actually reading*!
 I was going to print and laminate some, but it becomes so much more meaningful & purposeful for the students when they create something themselves.


I modeled how to trace our hand, and place numbers on our fingers. I modeled some fun coloring and then off they went. After students were finished, I laminated their hands so they could use them all year long.

Next week, we'll learn this poem as a beginning of the week refresher! 
I may use it as one of our transition songs too! ;-)


I'd love to hear how you introduce good fit books to your kids too! 
Feel free to comment below!

Grab your freebies from this blog post below!


13

How to Structure Your Reading Block!


Hey guys! So, I have toyed around with a lot of different reading block structures in my little teaching career. I've taught with a basal and I've taught without. I have tried a lot of different systems in my classroom to find the one that works just right for me. I want to share some of those with you so you can find the best way to structure your reading block because lets face it... we can't fit it all in... even though we wish we could. I'm going to share ones I've tried and the one that I am going to try out this year! I hope this can be helpful to you!

So, let's get started!
There so many ideas on how to organize reading workshop in the classroom! I love this pocket idea!


We'll start with how I used a basal in my classroom. (Don't mind the old pictures) :-)

When I had a basal in my classroom, I didn't use it like it was supposed to be used. 
My reading block was structured just like a D5 block.
I also didn't have time for a writers workshop, nor did I know how to do writers workshop at that Time!

I started each reading lesson with a whole group lesson.
 I chose a read aloud and completed a mini lesson with the students.

I remember this week specifically, because it was a favorite.
This week we were learning about the Walrus.
For my first mini-lesson this week, I read the book, "Tooth Trouble."
After I read this book, we talked about the steps to brushing a walrus's teeth using the first, next, last signal words. Then, we came up with materials.
During their writing station on that day, the students were to start writing about how to brush a Walrus's teeth.
Day 2, mini-lesson we shared and wrote down materials needed.
Day 3, we read a non-fiction passage about Walrus's and identified the fact.
Day 4, we answered text based questions.

The basal was used in my guided reading lessons. Sometimes I created graphic organizers to go with the story and sometimes I pulled graphic organizers. With my at level group we basically used this story for most of the week. We worked with phonics skills, sight words and various comprehension skills. My low group, worked with just phonics on one day, then we moved into reading the story. We read it all week and then towards the end of the week we finally worked on the comprehension concept. My high group would read the story by themselves, come to me for their comprehension lesson. Sometimes, I gave them independent work to also complete with this story. Then, after my high group read the story, I was able to work with them at their own level.

 I did have each group read the story with me, at least one time because on Friday all of  the students were to take a comprehension test.


Each comprehension activity was also differentiated.
If you want to read more about how I did that, then click here.


My reading structure at this time was a lot like the Daily 5 structure, but with my own twist. 
The students spent 10-15 minutes at each rotation.
It just depended how long I met with the group at my table.

At this time, I did not use regular word work activities. I used literacy station activities that were more skill based because our day was so tight and we didn't have much time to practice each day.
You can see the literacy stations here.


Many of the different structures that I've tried are with the reading workshop approach. It was in third grade, but these structures can be done at any grade level. My new school follows the reading workshop approach, which is kind of what I did anyway. They have a BIG focus on independent reading and the kids LOVE to read! I love that, and I could have easily done a mini lesson, had kids independently read and then respond to their text. But... to me, that just wasn't enough! I wasn't willing to give up literacy stations, I love the extra practice they provide to the kids! 

So, needless to say, I tried out a few different structures last year-here we go! :)

1. My first structure that I tried went like this:

I followed more of a Daily 3 approach. After assessments, students were placed into their reading groups. Then, they began their reading stations. The students visited three stations each day. The longest station was, read to self- everyone went to read to self at the same time.

The rotations were as follows:
You can find the rotation cards here.
You can read this whole blog post here.


Group 1: Spelling Station, Read to Partner, Read to self
Group 2: Word Study, Task Cards, Read to self
Group 3: Read to partner, Word Study, Read to Self
Group 4: Listen to Reading, Spelling Station, Read to Self
Group 5: Task Cards, Listen to Reading, Read to Self

Then, the next day, I moved the cards down to the next group. For instance, the next day, group 2 would go to spelling and read to partner and group three would do word study and task cards. This ensured that the students were able to get to each station each week.

I met with students at guided reading during their stations. Yes, sometimes they missed a station. After the first two rotations, I stopped and completed a mini-lesson. Here is a little explanation:

There is an entire post on just a readers workshop - you can find that post here.

********************************************************************************************************


2. Another reading block structure I tried was this one:

This idea came from my literacy coach. I expressed my concerns to her and she helped me organize my thoughts. I did love this structure, but the only thing missing were the stations...

Anyway, I lined up four pocket cards. Inside, there were note cards. On the top of each note card, I wrote the order in which our instruction was going for reader's workshop. I met with guided reading groups during cards 1 to 3. These cards were great because during respond to reading and the spelling notebook, students got to work at their own pace.


When I used the cards, my reading block looked like this: 
First, I did my mini-lesson:
This week our read aloud was Charlotte's Web.
We worked on plot using this activity.


After our mini-lesson, the students followed the cards. First they independently read for about 30 minutes. I met with 1-2 guided reading groups.
After independent reading, the students worked to respond to reading.
I had them do the same thing we did in our whole group lesson, just with their own book.
This student below is working on plot.


Not all lessons were able to work perfectly like this for respond to reading.
Some mini-lessons were gradual and took a few days.
During our Charlotte's Web study, we also focused on other comprehension concepts.


Sometimes, respond to reading was a writing assignment.
Sometimes, the kids worked on a graphic organizer.


Sometimes, it was just a reading response in their reading journal.
You've really just got to tweak the 'respond to reading' to make it go with what you are teaching.

Here is just a simple lesson. We did these pretty often!
For our read aloud, I had enough Stone Fox books. The students and I read Stone Fox together.
Our mini-lessons worked on predicting and confirming predictions. 
For each chapter we read, we first predicted what would happen. 
Then, after the chapter we confirmed our predictions. 
At the end of the book, we focused on how a character changed.


Then, after students did their independent reading, they chose a reading response and responded to the text.

Use cut and glue prompts during reading workshop! I love the ideas on this post on how to organize my reading workshop time!
Now we are onto pocket #3 - Spelling Notebook.
Each day students worked on their Daily Spelling Task in their spelling notebook.


When students finished this, they moved onto writers workshop. They just continued to work on what we worked on the previous day until it was time for our mini-lesson!


I have to admit, I wish I would have kept this reading structure. :-o
... Even though it didn't have the reading stations, I did find a way to fit them in during guided reading time. Just a thought for you if you are contemplating this one! :)

*****************************************************************************

3. The last reading structure I used was another station one! :-) I tell yah.... I just love them! I decided to go back to stations because, the rotations kept ME more accountable when meeting with guided reading groups. We all had a schedule to follow (mainly me). I needed to know who was coming when, and I didn't want the kids to miss anything.

Here is how this one went.

Still had our whole group mini-lessons:


Then, we broke out into stations.

These stations were different though. Like I said, I didn't want the kids to miss anything!
So, each week students got a reading choice board and they filled in their own station schedule. The only set times were the TT (Teacher Table) times. I had sticky notes by their groups names that had the days and number of rotation that they were coming to meet with me at the TT.

On the reading choice board I had a number by the station choice. That number told the students how many times they had to get to that station each week.

Read to self was 5x a week.
TT was assigned
Read with someone was 2x a week
Word Work was 3x a week (these were skill based literacy stations)
Spelling 2x a week (Spelling Notebook)


The students kept all work for the week in a folder. On Friday, students turned in their folder.
I still had students respond to reading. They only had to turn in one reading response, because we were doing a lot together as a whole group and in guided reading. 


This is the structure I stuck with for the rest of the year. It met students needs, it was easy to maintain and kept us ALL accountable!


This year, I am back in first grade. My reading block with look differently than all of the ones you've seen above. I am keeping it simple, and not doing too many complicated things!

I will be starting out each day with my whole group reading lesson. Each week we will have a read aloud, and we'll work on different comprehension concepts. I can't ever give these up! I love having my class learn together! 


Then, we will do our Reading Station Rotations.
I am going to have the following reading stations this year:

1. Read to Self
2. Skill Work
3. Word Work
4. Read to a Partner/Listen to Reading
5. Writing 

I am not sure if we can do all 5 each day. We may only do 3-4 each day unfortunately due to time constraints. 

For teacher table, each day I will just have my handy dandy Teacher Table Card. For each group I will just cover up one of their stations with my TT card and instead of going to that station - they'll come to me.

Here is a little visual of the reading rotation board I'll have.


What I plan to do, is cover up one rotation for everyone. So, this on this day, I took everyone's buddy reading time. The next day, I may meet with everyone during their writing stations, the next day, word work... etc.

I have certain plans for each station too:

Read to self - students will just independently read. I will not have them respond in first grade - third I probably would 1x a week.

Read to a partner/listen to reading: students will listen to a book together on CD on their assigned days. On the other days, they will simply read with a partner.

Word Work: Students will work with their spelling words and sight words using manipulatives like stamps, magnets, etc.

Skill Work: I plan to have a parent volunteer come in to read sight word passages with students and work on skill based literacy stations with the kids.

Writing: Students will continue to work on their writing workshop writing -or- choose a writing activity from choices provided.

The only thing I will ever need to prep is skill work! I wanted to make stations easier on myself this year! :-)

I hope this post was helpful! If you have any questions or additional ideas, comment below!! :)


7